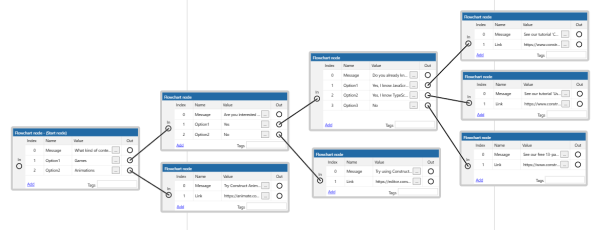
The Flowchart View allows visually editing a flowchart by setting up nodes, making connections between the nodes to form a tree structure and adding information that will be associated with each node. See also the manual section for flowcharts.
 The Flowchart View
Asides from showing the nodes and the connections between them, there is also a status bar at the bottom which displays the current zoom level, the caption of the last selected node and the index, and the name and value of the last selected output.
Adding and deleting nodes
To add new nodes, right-click in any empty space of the flowchart view and tap the Add node option.
 Context menu option to add a node
To delete a node you can do one of two things:
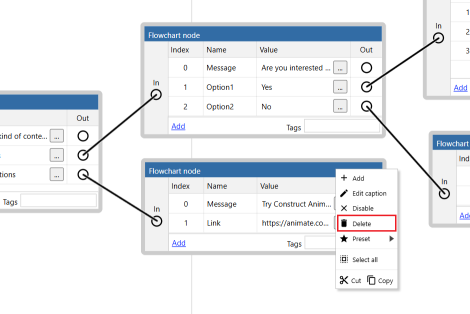
- Right-click on the caption of a node or any part which is not an output and choose the Delete option.
- Press Backspace or Delete after a node has been selected.
 Context menu option to delete a node
Editing nodes
Once a node has been created, there are a number of things that can be edited about them, including:
- Adding outputs
- This can be done by:
- Right-clicking on the node and choosing the Add option from the context menu.
- Clicking on the Add link at the bottom left of each node.
- Clicking the Add link in the Properties Bar when it is showing properties for a node.
| Context menu option |
Node link |
Properties bar |
|
|
|
- Deleting outputs
- This can be done by:
- Right-clicking on the output and choosing the Delete option from the context menu.
- Clicking the corresponding Remove link in the Properties bar when it is showing properties for a node.
| Context menu option |
Properties bar |
|
|
- Editing the tags
- This can be done by:
- Typing in the labelled text box in the node itself.
- Editing the corresponding property in the Properties bar.
| Tag text box |
Properties bar |
|
|
- Editing an output's name
- This can be done by:
- Double clicking on an output's name.
- Right-clicking on an output's name and choosing the Edit option.
- Editing the corresponding property in the Properties bar.
| Context menu option |
Properties bar |
|
|
- Editing an output's value
- This can be done by:
- Double clicking on an output's value.
- Right-clicking on an output's value and choosing the Edit option.
- Clicking on the button next to the value.
- Editing the corresponding property in the Properties bar.
| Button next to value |
Properties bar |
|
|
The Caption of a node can be edited from the Properties bar, by right clicking it and choosing the Edit caption option or by double clicking it on the corresponding node.
A few properties of nodes can only be edited from the Properties Bar, such as Start node and Color.
Sorting outputs in a node
After an output is added to a node it is possible to change its position by clicking and dragging it to be on top or below another output in the same node.
Connecting nodes
To connect two nodes click an output icon and then drag to the input of another node. This can be done the other way around too, clicking and dragging from an input icon into an output icon.
Unlinking nodes
To remove the connection between two nodes, right click on the corresponding output or input and choose the Unlink option from the context menu.
Links can also be selected by clicking on them (the cursor changes when clicking will select it), when a link is selected it will show as a "marching ants" animation and at that point it can be deleted by using the Backspace or Delete keys in the keyboard.
Connecting many outputs to the same input
In the case of connecting multiple outputs to the same input, each of the parent nodes will start showing a Parent Index property, both in the node and the Properties bar.
The Parent Index can be used with some actions and expressions that need to choose which parent to use in the case a node has more than one.
| Parent Index in node |
Properties Bar |
|
|
Moving and resizing nodes
Nodes can be moved by clicking and dragging from the caption and can be resized by clicking and dragging from the borders.
The columns in each node can also be resized by clicking and dragging between them.
| Move drag |
Resize drag |
Column resize drag |
|
|
|
Multi-selection
By holding Shift while selecting nodes and outputs it is possible to select multiple elements at the same time.
Doing this it is possible to delete multiple nodes and outputs at the same time as well as moving multiple nodes at the same time.
Rectangle selection tool
Clicking and dragging in empty space will trigger the appearance of a selection rectangle. Any nodes overlapping the rectangle when the pointer is released will be selected. If Shift is held down the nodes will be added to any existing selection.
Cut, copy and paste
Cut, copy and paste of nodes is supported through context menu options and the common keyboard shortcuts. Cutting or copying when there is an active multi-selection will perform the appropriate action on the whole selection.
Once there is flowchart content on the clipboard it is also possible to paste it in a different flowchart to the original.
Scrolling and Zooming
There are a few ways to scroll in the Flowchart View:
- Use the vertical and horizontal scrollbars at the edges of the view.
- Scroll the mouse wheel to scroll vertically. You can also hold Shift to scroll horizontally.
- Hold the middle mouse button and drag the mouse.
- Hold Space and move the mouse.
On desktop systems, middle-mouse dragging is probably the most convenient way to move around the flowchart.
To zoom hold Control (Meta on Mac) and scroll the mouse wheel.
Make sure to check the Keyboard shortcuts section of the manual for a complete list.
Managing complex flowcharts
When flowcharts start becoming large it can be difficult to keep track of what is going on just by looking at it.
These are a few features that can help with that:
- Node colors
- All nodes can be given a unique color which is applied to it's border. Helps highlight important nodes.
- Output link colors
- Each output can be given a unique color that is used to draw it's corresponding link. This can help to differentiate between links when it starts getting crowded. This property can only be changed from the properties of an output shown in the Properties Bar.
- Output link mode
- Each output can use two different methods to draw it's corresponding link. It can be either a straight line (default method), or it can use path finding so the link avoids overlapping other nodes. This can help in cases were a straight link is overlapping other nodes making the flowchart look messy. This property can only be changed from the properties of an output shown in the Properties Bar
- Reference nodes
- This types of nodes are used as a placeholder for a different flowchart. Can be useful to split up large flowcharts in more manageable chunks.
- Comment nodes
- This types of nodes are used to place comments directly in a flowchart.
Preset nodes
Nodes can be saved to be used later as a base to create new nodes.
This can be useful in more complex use cases as it is likely that in any given project all of the existing flowchart nodes will follow a similar structure so they can be easily processed by an Event Sheet.
Manually adding all the outputs and editing the names of the outputs so they match the format being used every single time a node is created can quickly become tedious and also error prone.
Identifying the format of the nodes that are going to be used more often and saving them as presets can save time, avoid errors and just make the experience of editing a flowchart a little bit more enjoyable.
Saving a node as a preset is easy, you can either change the corresponding property in the Properties bar or use the Preset►Add to presets context menu option of a node.
| Preset Context Menu |
Properties Bar |
|
|
Once there are some nodes set as presets, a new option to create nodes will appear among the context menu options to create nodes.
Clicking on it will show a dialog with all the preset nodes in the current project.
The Preset node picker dialog shows all the preset nodes as a tree with the flowchart they belong to as their top most parent. The tree like other similar controls in Construct allows to, create folders, delete, rename and rearrange items as needed.
The name used for the items in the tree is the caption of the corresponding node, so renaming an item in the picker dialog will change the caption of the corresponding node.
Disabling nodes and outputs
When editing a flowchart it can be useful to disable nodes or outputs to try out runtime changes without outright deleting elements of the flowchart. This can be thought as commenting lines of code in traditional programming, a method to make changes that are not yet final.
Nodes and outputs can be disabled using the corresponding context menu options or by means of the Properties bar.
| Node Context Menu |
Output Context Menu |
Properties Bar |
|
|
|
Both disabled nodes and outputs give feedback of the state in the main view to make them easily identifiable.
| Disabled Node |
Disabled Output |
|
|
At runtime, a disabled node is treated as if it's not there, so if the state of the flowchart tries to advance into a disabled node, it won't happen, effectively cutting off any nodes past the disabled one.
Similarly a disabled output is treated as if it doesn't exist at runtime, it can't be followed, it's information can't be queried and it's not considered in the for each loop that iterates through outputs.
Default outputs
Outputs can be set as the default one in their node by a context menu option or through the Properties bar.
| Context Menu |
Properties Bar |
|
|
The two use cases of this setting are the following:
- A default output can be chosen at runtime using the Flowchart Controller ACEs that specifically target them. This allows to more easily manage a default option in each node without the need of enforcing a convention when designing the nodes.
 Default output
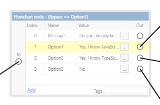
- In the case of a node being disabled, the runtime follows default outputs automatically if the state of the flowchart falls in a disabled node. If the following node is also disabled the runtime will attempt to continue following default outputs until it lands on a node which is not disabled.
 Disabled and Bypassed node